Panel Schedule Creation from Takeoff Data for Estimators
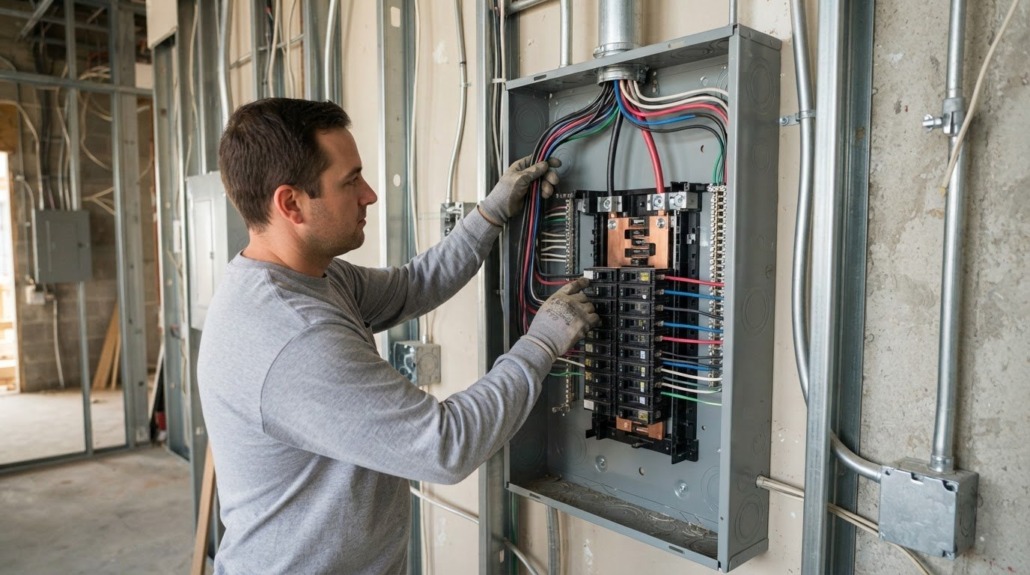
Takeoff data becomes a usable panel schedule when each load is matched to a panel row, assigned device and conductor details, and placed at the correct breaker position. Panel schedule creation from takeoff data is a step-by-step workflow, not simply a spreadsheet transfer: organize the takeoff, populate the schedule, then arrange breakers in the required sequence.
Manual entry can feel like the slowest part of estimating. Repeatedly transferring details from takeoff notes to a panel spreadsheet leaves room for omissions and makes revisions harder to track.
This guide explains how to turn takeoff items into spreadsheet rows, enter protective-device and conductor information, choose a practical tool, and arrange odd- and even-numbered breakers. You’ll learn how to keep the schedule organized while preserving the details needed to review the work and prepare a clear bid.
Key Takeaways
- Organize takeoff items into consistent spreadsheet rows so each load can be traced to its panel schedule entry.
- Capture protective-device and conductor details alongside each circuit’s load information.
- Arrange sequential odd-numbered breakers on the left and even-numbered breakers on the right.
- Balance connected loads across phase buses so bus currents are approximately equal in normal use.
- Use Panel Scheduler when you need a dedicated tool for building and organizing panel schedules.
Entering protective device and conductor information
Enter each circuit’s protective-device and conductor details alongside its load description. Keep the plan reference visible so each spreadsheet entry can be traced to its source. Record the breaker or fuse type, pole count, rating, conductor identification, and circuit designation when shown. Matching these fields helps keep each load paired with its intended protection.
Use the circuit configuration shown in the drawings and equipment information. For a three-pole circuit, enter 3 in the CB/Fuse Poles field. For a two-pole circuit, enter 2.
Takeoff examples also identify plug type CS8369C as a three-phase, 50-amp connection and plug type 460C9W as a three-phase, 60-amp connection. Keep plug type, phase, and amperage together in the relevant circuit record.
Record the connected load before reviewing its circuit assignment. According to the U.S. Consumer Product Safety Commission, total wattage on a branch circuit should be less than 2000, as called for on the Appliance Power Budget page 11. Use that figure as the stated budget check, then compare each load entry with the applicable project documents. Don’t combine unlike loads or erase their individual descriptions.
Enter the panel’s voltage, rating, and type from the project specifications and panel schedule. These fields identify the equipment serving the circuits and distinguish panels with similar names. Preserve the units and labels used in the documents. If the drawings show a panel designation, use it consistently in the spreadsheet, circuit rows, and review notes.
How do you size panels, breakers, and feeders from takeoff data? Group the connected loads by panel, then use the project’s load assumptions and equipment specifications to evaluate panel and feeder requirements. Match breaker details to the circuit configuration and specified protective device. Ensure the panel rating and conductor information align with the resulting design and project documents.
Conductor entries should include enough detail to distinguish each circuit’s wiring. Capture conductor size, material, insulation or cable type, and ground or neutral details when shown in the plans or specifications. Where possible, enter each value in its own field. A clear layout makes discrepancies easier to spot than a single combined note.
How do you verify a panel schedule against electrical plans and specifications? Compare panel identifiers, circuit descriptions, load details, poles, protective devices, and conductor entries with the corresponding plan callouts and specification notes. Resolve mismatches before finalizing the schedule, and retain a reference to the document location for each correction.
Before proceeding, review the schedule by panel and circuit. Confirm that voltage, rating, and panel type are consistent, and that every device and conductor detail belongs to the correct row. This focused check catches transcription errors while the source drawings are easy to consult.
Generating panel spreadsheet rows
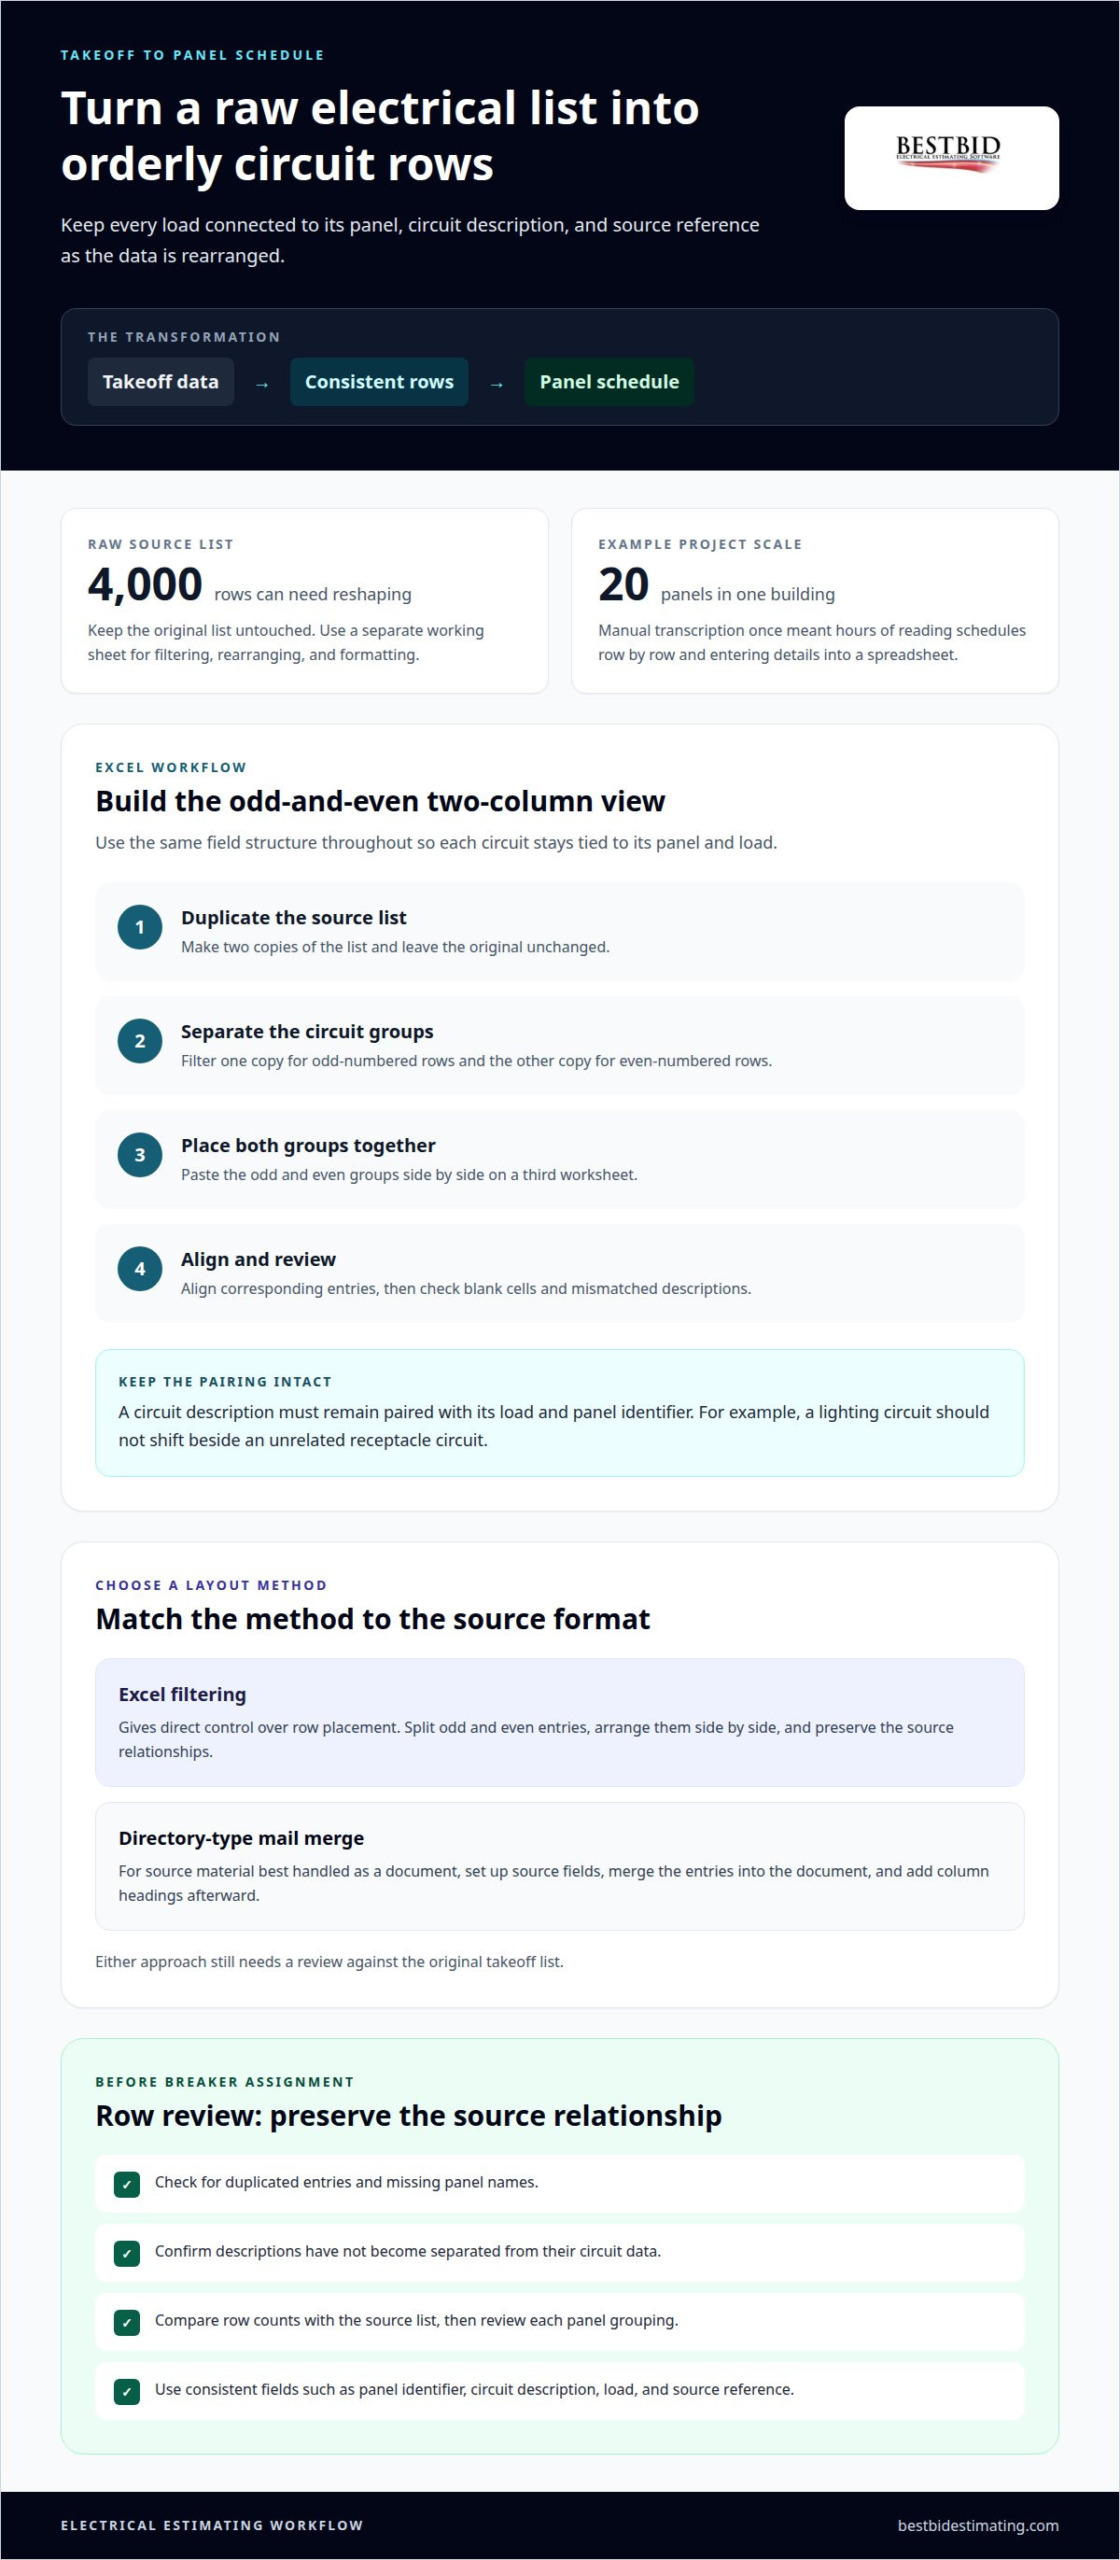
A raw electrical data list can contain 4,000 rows, while a panel schedule needs orderly circuit entries. The goal is to reshape the source list without losing the relationship between each load and its panel. Start by preserving an untouched copy. Use a separate working sheet for filtering, rearranging, and formatting rows.
For a building with 20 panels, manual transcription once meant hours of reading schedules row by row and entering details into a spreadsheet. A structured worksheet reduces repeated handling. Give each field its own column, such as panel identifier, circuit description, load, and source reference. Use the same column order for every panel, so later review follows a consistent pattern.
An Excel workflow can split odd- and even-numbered circuit entries into side-by-side groups:
- Make two copies of the source list, keeping the original unchanged.
- Filter one copy for odd-numbered rows and the other for even-numbered rows.
- Paste the odd and even groups side by side on a third worksheet.
- Align corresponding entries, then review blank cells and mismatched descriptions.
This arrangement creates the two-column view commonly used for panel schedules. Preserve the original row data as you move entries. Keep each circuit description paired with its load and panel identifier. If an odd-side row names a lighting circuit, its load should not shift beside an unrelated even-side receptacle circuit.
When the source material is best handled as a document, a Directory-type mail merge offers another formatting option. Set up the source fields first, then merge the entries into the document. Add column headings to the merged document afterward. This method presents repeated records consistently, but still requires a review against the source list.
Choose a method that suits the source format and review task. Excel filtering gives direct control over row placement, while a Directory merge organizes records into a formatted document. Either way, preserve a clear link between every generated row and its original takeoff entry. Consistent field names also make it easier to sort or revise a panel without rebuilding the schedule.
Before using the generated rows, scan for duplicated entries, missing panel names, and descriptions that became separated from their circuit data. Compare row counts with the source list, then review each panel grouping. These checks help catch transfer errors before the schedule moves into breaker assignment. A consistent electrical estimating workflow keeps the takeoff and schedule connected.
For the Excel route, make two copies of the list, filter one for odd rows and the other for even rows, then paste the groups side by side on a third worksheet. Keep the original list available while arranging entries, and check that each row remains associated with its panel and load. The paired layout shows both groups together, while careful review preserves their source relationships.
For a document-based layout, use a Directory-type mail merge, then add column headings to the merged document. Review the formatted records against the source before using them. Whether you arrange rows in a worksheet or a merged document, retain enough context to trace each entry to its original takeoff information. This makes later corrections more targeted and reduces the risk of carrying a misplaced or incomplete row into the schedule.
Manually adding and arranging breakers
Start with the panel layout shown in the project documents. Enter breaker positions in order, keeping the requested arrangement consistent: sequential odd-numbered breakers on the left and even-numbered breakers on the right. For example, place circuit 1 opposite circuit 2, then continue with the next odd and even positions. This makes the schedule easier to scan alongside the panel layout.
Add each breaker to the row for its assigned circuit. Carry over the circuit description and connected load, then record the protective-device details shown for that circuit. Keep lighting and receptacle circuits distinct, even when adjacent positions are available. Clear descriptions help estimators and reviewers trace each schedule entry back to the plan.
How do you assign circuits and balance loads across panel phases? Assign each circuit to the panel and phase arrangement shown in the design, then distribute connected loads among phase buses so their currents are approximately equal in normal use. The U.S. Environmental Protection Agency describes this as the goal when dividing connected loads among phase buses.
For a multipole breaker, represent the circuit using the connected positions shown in the panel design. Keep its circuit identity and associated load together rather than treating each occupied position as a separate load. If the schedule spans more than one row for a device, use consistent notation to make the relationship clear to the next reviewer.
Use a deliberate sequence when entering breaker rows:
- Identify the panel and the circuit position from the schedule or drawing.
- Enter the circuit description and connect it to the correct takeoff load.
- Add the specified breaker information and phase assignment.
- Review neighboring positions for skipped, duplicated, or misplaced entries.
After arranging breakers, scan both sides of the schedule from top to bottom. Confirm that odd-numbered positions remain on the left and even-numbered positions on the right. Look for an empty position that interrupts the sequence or a description beside the wrong circuit number. These visual checks catch layout errors before the schedule is issued.
Then review load distribution by phase using the project’s circuit and load information. If one phase carries noticeably more connected load, revisit assignments within the design’s constraints. Don’t move a circuit just to make the columns look balanced. The schedule must reflect the intended electrical design, not just a tidy spreadsheet.
Finish by comparing breaker positions and circuit labels with the corresponding panel drawing. Correct the schedule while keeping each row clearly connected to its plan reference. A consistent arrangement supports faster review, especially when revisions change circuit locations or descriptions.
Panel schedule creation workflow
A reliable workflow keeps each takeoff item connected to its schedule entry. Start with the source drawings, equipment schedules, and project specifications. Identify the panel serving each load before creating circuit rows, and preserve a reference to the drawing or takeoff record. That reference helps explain later changes and makes review more direct.
Next, organize source data by panel and load type. Separate lighting, receptacle, and equipment entries when the plans distinguish them. Keep original takeoff descriptions beside the cleaned-up schedule wording.
Retain any room label or equipment tag that identifies a load. A shortened description should still point clearly to its source.
Manual creation requires an estimator to transfer and arrange each entry. Automated tools can reduce repetitive data handling and apply consistent layouts, but the results still need review against the plans. The practical difference is where the work happens: manual workflows rely more on individual entry, while automation standardizes recurring steps.
Calculate circuit loads by grouping takeoff quantities with the corresponding documented load information. Apply the project’s stated assumptions, then total the connected loads assigned to each circuit. Keep the quantity, unit-load basis, and resulting circuit assignment traceable. Don’t substitute an assumed value when the project documents specify a different basis.
Common risks include duplicated takeoff items, omitted loads, mismatched panel identifiers, and circuit descriptions shifted beside the wrong data. A spreadsheet can look complete while its entries are linked to the wrong sources. Compare grouped quantities with the original takeoff and trace unusual entries to their drawing references.
Use this sequence to move from raw takeoff to a review-ready schedule:
- Preserve the source list and identify the current drawing set.
- Group loads by panel, then retain useful location and equipment tags.
- Build circuit entries from the project’s load information and assumptions.
- Apply the panel’s documented arrangement and organize the schedule fields.
- Review entries against plans, specifications, and source takeoff records.
At each transition, make the source and resulting record easy to compare. For example, if a drawing revision changes an equipment tag, update the related takeoff record and schedule description together. Record the revision reference with the change. This keeps an outdated label from lingering in one worksheet while the rest of the schedule reflects newer documents.
Before issuing the schedule, review completeness and consistency separately. Completeness means every relevant takeoff item has a destination. Consistency means panel names, circuit descriptions, and load references match across the schedule and plans. A final row-by-row trace is especially useful after sorting or importing data, when entries can shift without an obvious visual warning.
What takeoff data is needed to build an accurate panel schedule?
An accurate schedule depends on traceable takeoff entries, not just a list of quantities. Each load needs enough identifying information to connect it to a panel, circuit, and location. Preserve equipment tags, room names, drawing references, and descriptions from the electrical plans. These identifiers help distinguish similar loads in different areas.
Capture the quantity and unit for every takeoff item. For example, keep a fixture count distinct from a measured cable or conduit length. Keep the item description beside its quantity rather than separating the fields during sorting. This lets a reviewer understand what the number represents without reopening the takeoff record.
Load information is essential. Record the documented electrical characteristics for each item, such as voltage, phase, amperage, or wattage when provided in the plans or equipment schedules. Keep the source visible. If equipment has a model or tag, retain that identifier with its load data so the schedule entry can be traced to the intended equipment.
Gather the documents that explain how the takeoff items connect:
- Electrical plans with panel designations, circuit callouts, and equipment locations.
- Panel schedules or riser diagrams showing the intended distribution arrangement.
- Equipment schedules listing load characteristics and identifiers.
- Project specifications that define the design basis and required descriptions.
- Takeoff records showing quantities, units, and source drawing references.
Use consistent field names when combining those sources. A spreadsheet might include panel, circuit, location, load description, quantity, unit, and drawing reference. Add device or conductor fields when the source documents support them. Consistency matters: a tag called “EF-1” should not become “Exhaust Fan” in one record and “Fan 1” in another without a clear relationship.
Separate known values from derived calculations. Keep the original quantity and documented load basis beside any calculated circuit total. This distinction makes revisions easier to follow. If a drawing change affects one equipment item, you can identify the related quantity and schedule entry without rebuilding unrelated records.
Before preparing the schedule, group data by panel and location. Then look for missing identifiers, conflicting descriptions, and items without clear source references. A receptacle count without a room or plan reference may be difficult to assign correctly. Resolve gaps by tracing the entry through the project documents, not by guessing.
Accura Cadd PDF Draw supports work that begins with electrical plan takeoffs. Explore electrical takeoff tools to connect plan information with a more organized estimating workflow.
Best Bid: Panel Scheduler
Best Bid’s Panel Scheduler is a practical next step when spreadsheet-based panel work becomes difficult to manage. It gives electrical contractors a dedicated way to organize panel schedules alongside takeoff and estimating workflows. Use it to prepare schedules more consistently from project information, while still reviewing circuit assignments and design details against the plans.
For broader electrical estimating work, Best Bid Next Generation and Best Bid Hybrid Pro are also available. Accura CADD PDF Draw supports work that starts with electrical drawings. Choose the tool that fits the task rather than forcing every project into the same process.
If you’re ready to discuss your panel scheduling needs, contact Best Bid.
Make Your Next Schedule Easier to Maintain
A panel schedule should stay useful as project documents change, rather than becoming a static spreadsheet that quickly falls out of step. Treat panel schedule creation from takeoff data as the start of a reliable handoff: keep schedule records connected to current project information and apply revisions consistently. This gives estimators a clearer basis for reviewing updates and carrying decisions into future bids.
Choose a workflow your team can repeat. Clear ownership of schedule changes, consistent field names, and traceable source records keep the handoff practical as work progresses. When the process feels too manual, a dedicated scheduling tool can help structure the task without replacing careful design review.
Best Bid serves electrical contractors with estimating and drafting tools, including Best Bid Next Generation, Best Bid Hybrid Pro, and Accura Cadd PDF Draw. To discuss panel scheduling and the next step for your estimating workflow, contact Best Bid about panel schedules. Build a process that supports accurate work and keeps your next project moving.
Frequently Asked Questions
How do you create an electrical panel schedule from takeoff data?
Start by matching each takeoff item to its panel and project reference, then build circuit entries from the load details in the documents. For example, a tagged piece of equipment should retain its location and drawing reference as it moves into the schedule. After assigning entries, compare the completed schedule with the current electrical plans. This traceable approach helps identify items changed between drawing revisions.
What software converts electrical takeoff data into panel schedules?
Best Bid offers Panel Scheduler for panel scheduling, along with Best Bid Next Generation and Best Bid Hybrid Pro for electrical estimating. Accura CADD PDF Draw supports work involving PDF drawings. Choose a starting point based on whether the task focuses on scheduling, estimating, or working with plan files. Keep the source takeoff and design documents available for review: software does not replace checking schedule entries against project requirements.
How much does electrical takeoff and panel schedule software cost?
The price depends on the product selected and is provided after a quote request. Best Bid’s estimating software is purchased once, with no recurring software fees. Relevant cost factors include which product suits the estimating or panel-scheduling task and whether drawing tools are also needed. When requesting a quote, describe your workflow and product needs so the options fit the work your electrical contracting team handles.